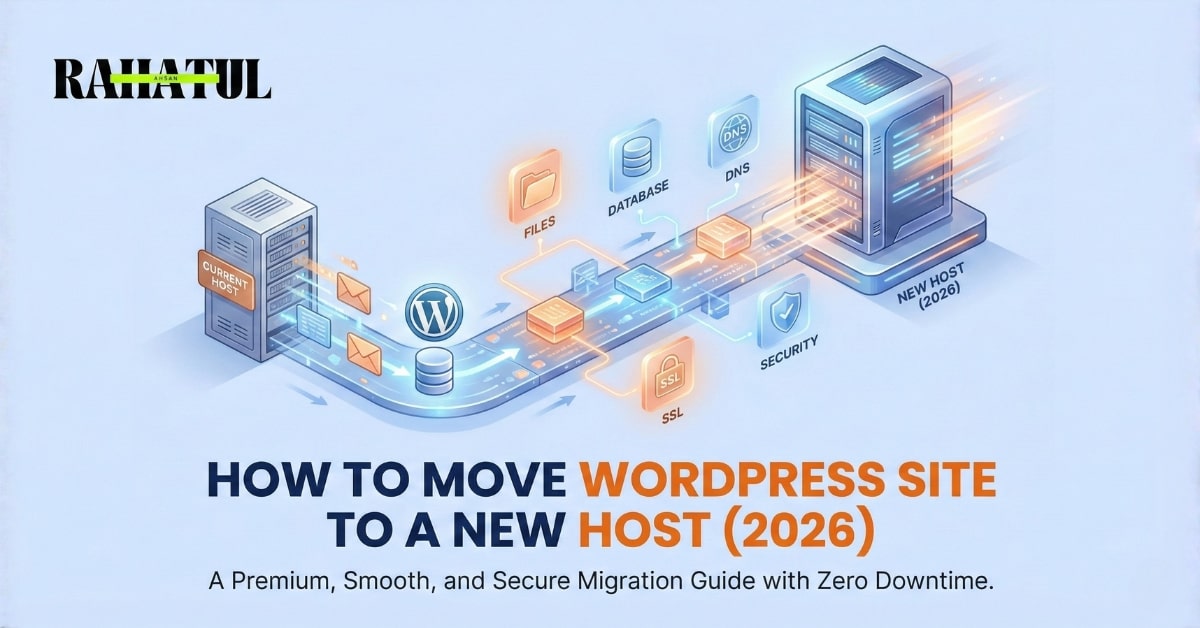
Moving your WordPress site to a new host in 2026 might seem challenging at first. But don’t worry—it’s easier than you think. Whether you’re upgrading to a faster host, reducing costs, or improving security, this guide will walk you through each step. The goal is to ensure that your site moves smoothly, with no downtime and no data loss.
Why Should You Move Your WordPress Site?
There are several good reasons why you might want to move your WordPress site to a new host in 2026:
- Improved Speed: Faster servers lead to a better user experience and better SEO rankings. A faster website is more likely to rank higher in search engines.
- Better Features: Some hosts offer free SSL certificates, daily backups, staging sites, and other features that help improve security and performance.
- Cost Savings: Moving to a more affordable hosting provider can save you money without sacrificing quality.
- Enhanced Security: New hosts often offer better security measures, such as advanced firewalls and regular updates.
- Better Support: If your current host isn’t providing good customer support, switching to a new one with 24/7 support can make a big difference.
Moving your WordPress site to a modern host in 2026 can help you improve your site’s speed, security, and scalability. Now, let's dive into the process of how to move WordPress site to a new host.
Step 1: Choose a New Hosting Provider
The first step in the migration process is choosing the right host. There are many hosting providers available, so it’s important to pick the one that fits your needs. Here’s a breakdown of the most popular hosting types:
- Shared Hosting: Perfect for small to medium-sized websites. It’s affordable but may not be as fast as other options because you share resources with other websites.
- VPS Hosting: A step up from shared hosting. It gives you more control and better performance.
- Dedicated Hosting: Offers the best performance but at a higher price. Ideal for larger sites that need a lot of resources.
- Managed WordPress Hosting: Designed specifically for WordPress. It offers great performance, security, and automatic updates.
Top recommended hosts for 2026 include:
- SiteGround: A great choice for beginners. Known for its speed and reliability.
- Bluehost: Affordable and reliable, perfect for new users.
- WP Engine: Managed WordPress hosting with excellent support.
- Kinsta: High-performance hosting, great for large sites and businesses.
Step 2: Back Up Your WordPress Site
Before doing anything else, it’s crucial to back up your WordPress site. A backup ensures that you don’t lose any important data during the migration process.
There are two main ways to back up your site:
- Manual Backup: This involves downloading all your WordPress files via FTP and exporting your database using phpMyAdmin.
- Using a Plugin: Backup plugins like UpdraftPlus or BackupBuddy can automatically back up your site for you.
Make sure to store your backups in two places—on your computer and in the cloud (e.g., Google Drive or Dropbox).
Step 3: Prepare Your New Host
Once you’ve backed up your site and chosen a new hosting provider, it’s time to prepare the new server. Here’s what you need to do:
- Sign Up for a Hosting Plan: Register for a hosting plan with your new provider and log into the control panel (cPanel).
- Create a New Database: Most hosts allow you to create a MySQL database through the control panel. Make a note of the database name, username, and password.
- Install WordPress: Many hosts offer a one-click WordPress installation. If yours doesn’t, you can manually install WordPress by downloading it from WordPress.org and uploading it to your new host.
Step 4: Move Your WordPress Files
The next step is to move your WordPress files to the new host. You can do this using FTP (File Transfer Protocol) or SFTP (Secure FTP).
Here are the steps:
- Access the Old Host: Use an FTP client like FileZilla to connect to your old hosting account.
- Download Your Files: Download all your WordPress files, especially the wp-content folder (which includes your themes, plugins, and uploads) and the wp-config.php file.
- Upload Files to New Host: Use the same FTP client to upload the downloaded files to the root directory of your new host (usually public_html).
Step 5: Export and Import Your Database
The database contains all your site’s content, settings, and other important data. Here’s how to transfer it:
Export the Database:
- Log in to phpMyAdmin on your old host.
- Select your WordPress database and click Export.
- Choose the Quick export method and save the file in SQL format.
Import the Database:
- Log in to phpMyAdmin on your new host.
- Select the new database you created earlier and click Import.
- Upload the SQL file you exported and import it.
Step 6: Update wp-config.php File
Now that you’ve moved your files and database, you need to update the wp-config.php file with the new database details. Open this file in a text editor and make the following changes:
define(‘DB_NAME’, ‘new_database_name’);
define(‘DB_USER’, ‘new_database_username’);
define(‘DB_PASSWORD’, ‘new_database_password’);
define(‘DB_HOST’, ‘localhost’);
Save the file and upload it to the new host using your FTP client.
Step 7: Update DNS Settings
After transferring your files and database, it’s time to update the DNS settings to point your domain to the new host.
- Find Your New DNS Details: Your new hosting provider will give you the nameservers (DNS details).
- Update DNS: Log in to your domain registrar’s control panel (e.g., GoDaddy, Namecheap) and update the nameservers to the ones provided by your new host.
Note: DNS changes can take up to 48 hours to propagate across the internet, so be patient during this process.
Step 8: Test Your Site
After the DNS changes have propagated, thoroughly test your site to make sure everything works:
- Check for Missing Images or Broken Links: Sometimes, files or links might not transfer correctly.
- Test Database Connection: Ensure that your site is connecting to the database properly.
- Check Site Speed: Test your site’s speed to ensure it loads quickly. Use tools like GTmetrix or Google PageSpeed Insights to analyze your site’s performance.
FAQs
1. How long does it take to move a WordPress site to a new host?
The migration process usually takes 2-4 hours, depending on the size of your site. DNS propagation can take up to 48 hours.
2. Will my site experience downtime during migration?
With proper planning, your site can experience minimal downtime. Test everything before switching DNS, and ensure the old site is still live during the transition.
3. Do I need to move my email to the new host?
If your email is hosted with your old provider, you’ll need to move it as well. Be sure to update your MX records to point to the new host.
4. Can I move my WordPress site to a new host without using a plugin?
Yes, you can manually migrate your WordPress site. However, using a plugin can make the process easier and faster, especially for beginners.
Final Thoughts
Migrating your WordPress site to a new host in 2026 is simpler than ever. Whether you decide to use a plugin or move manually, following these steps will ensure a smooth migration process. You can improve your site’s speed, security, and scalability by moving to a better hosting provider.
If you need help with the migration, feel free to visit rahatulahsanrafi.com for professional WordPress development services. I’m here to make your WordPress migration smooth and worry-free!